-
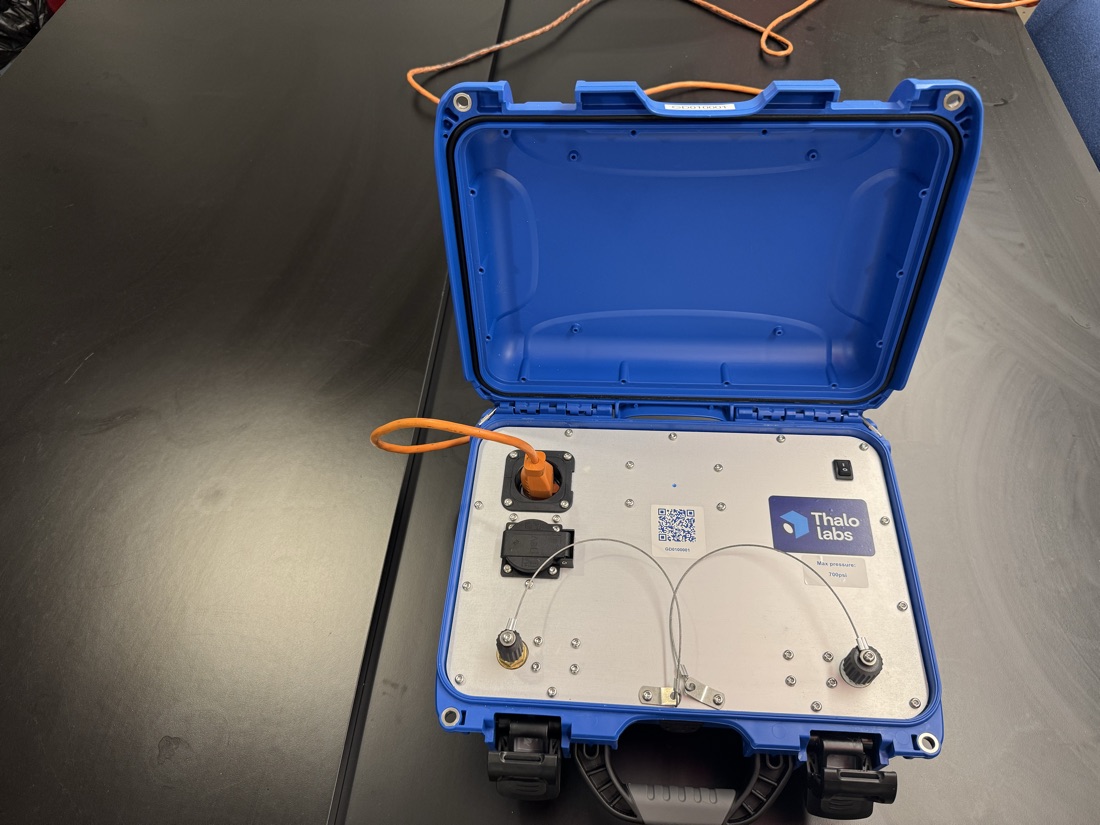
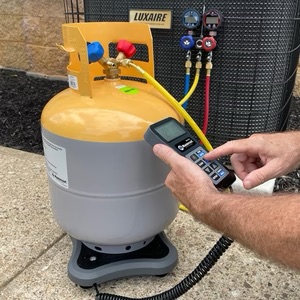
Set Gordon on a flat, dry surface near the outdoor unit. Plug into 120V and flip the rocker switch (there is no battery), then wait for cell signal (the dial turns blue).
Learn the two front ports: left is 1/4" source, the hose you rotate (nitrogen, then vacuum). Right is 3/8" system, which stays connected the whole job.
-
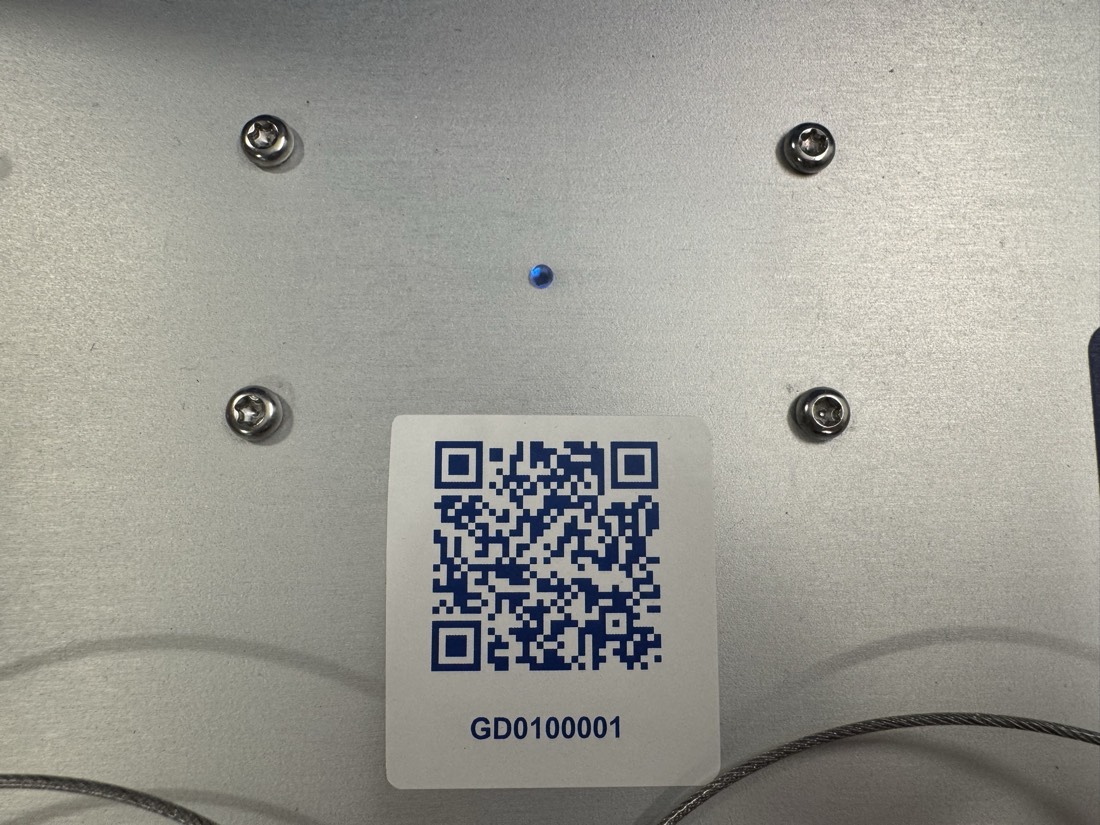
Scan the QR sticker on Gordon's front face to open the job on your phone.
-
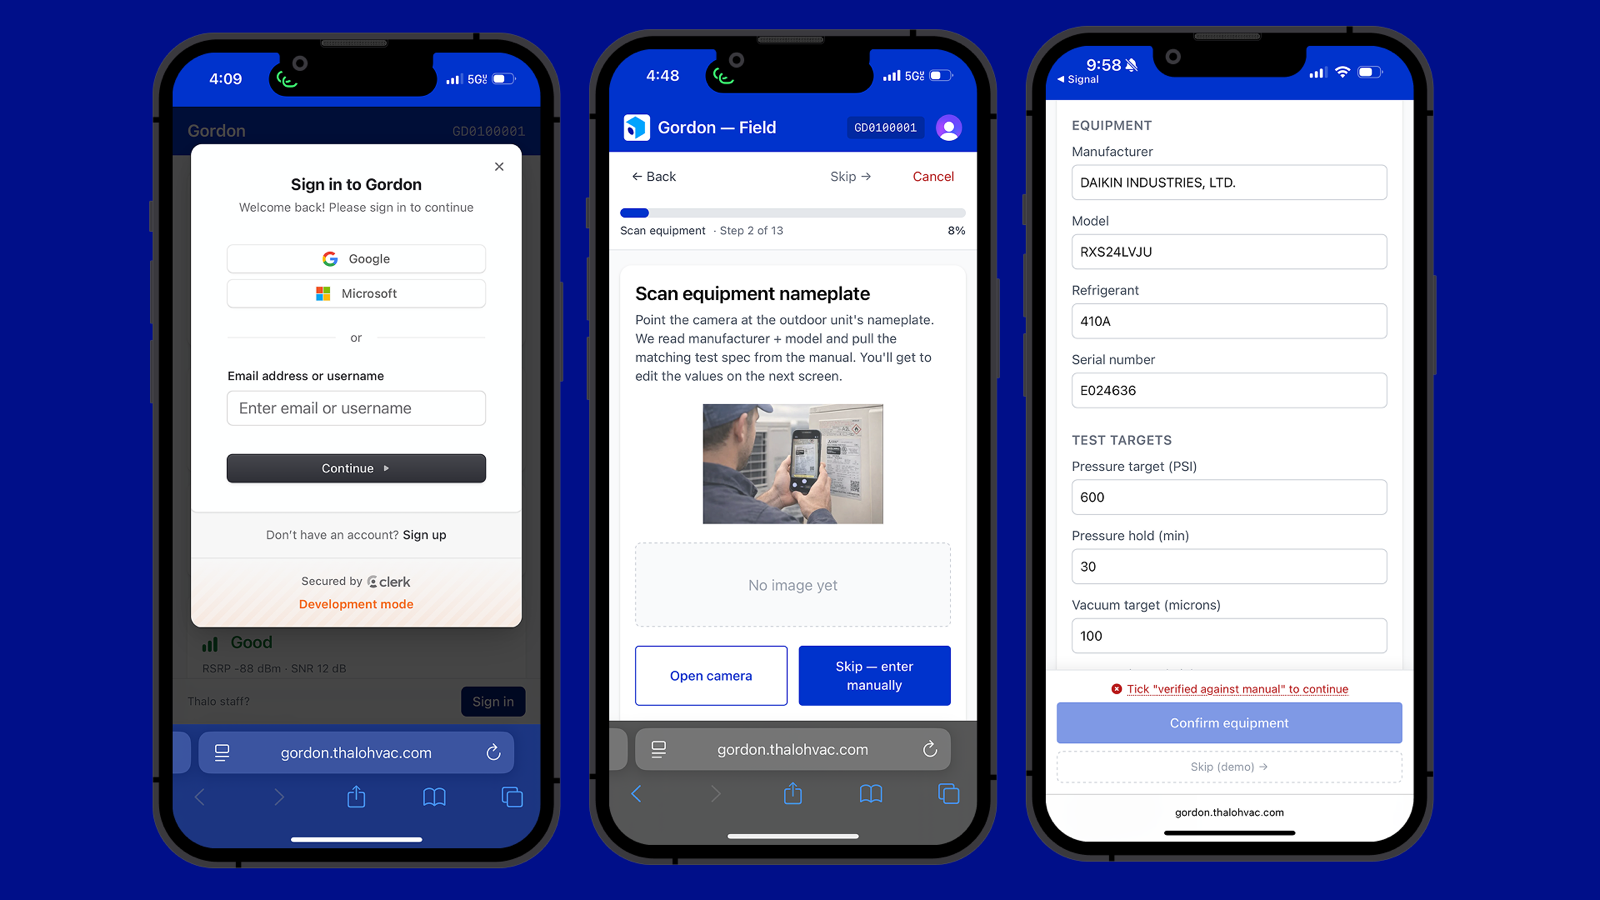
Sign in with Google, Microsoft, or your work email.
Tap
Begin installation, then scan the outdoor unit's nameplate so Gordon pulls the model and test spec.Check the model, refrigerant, and test targets.
-
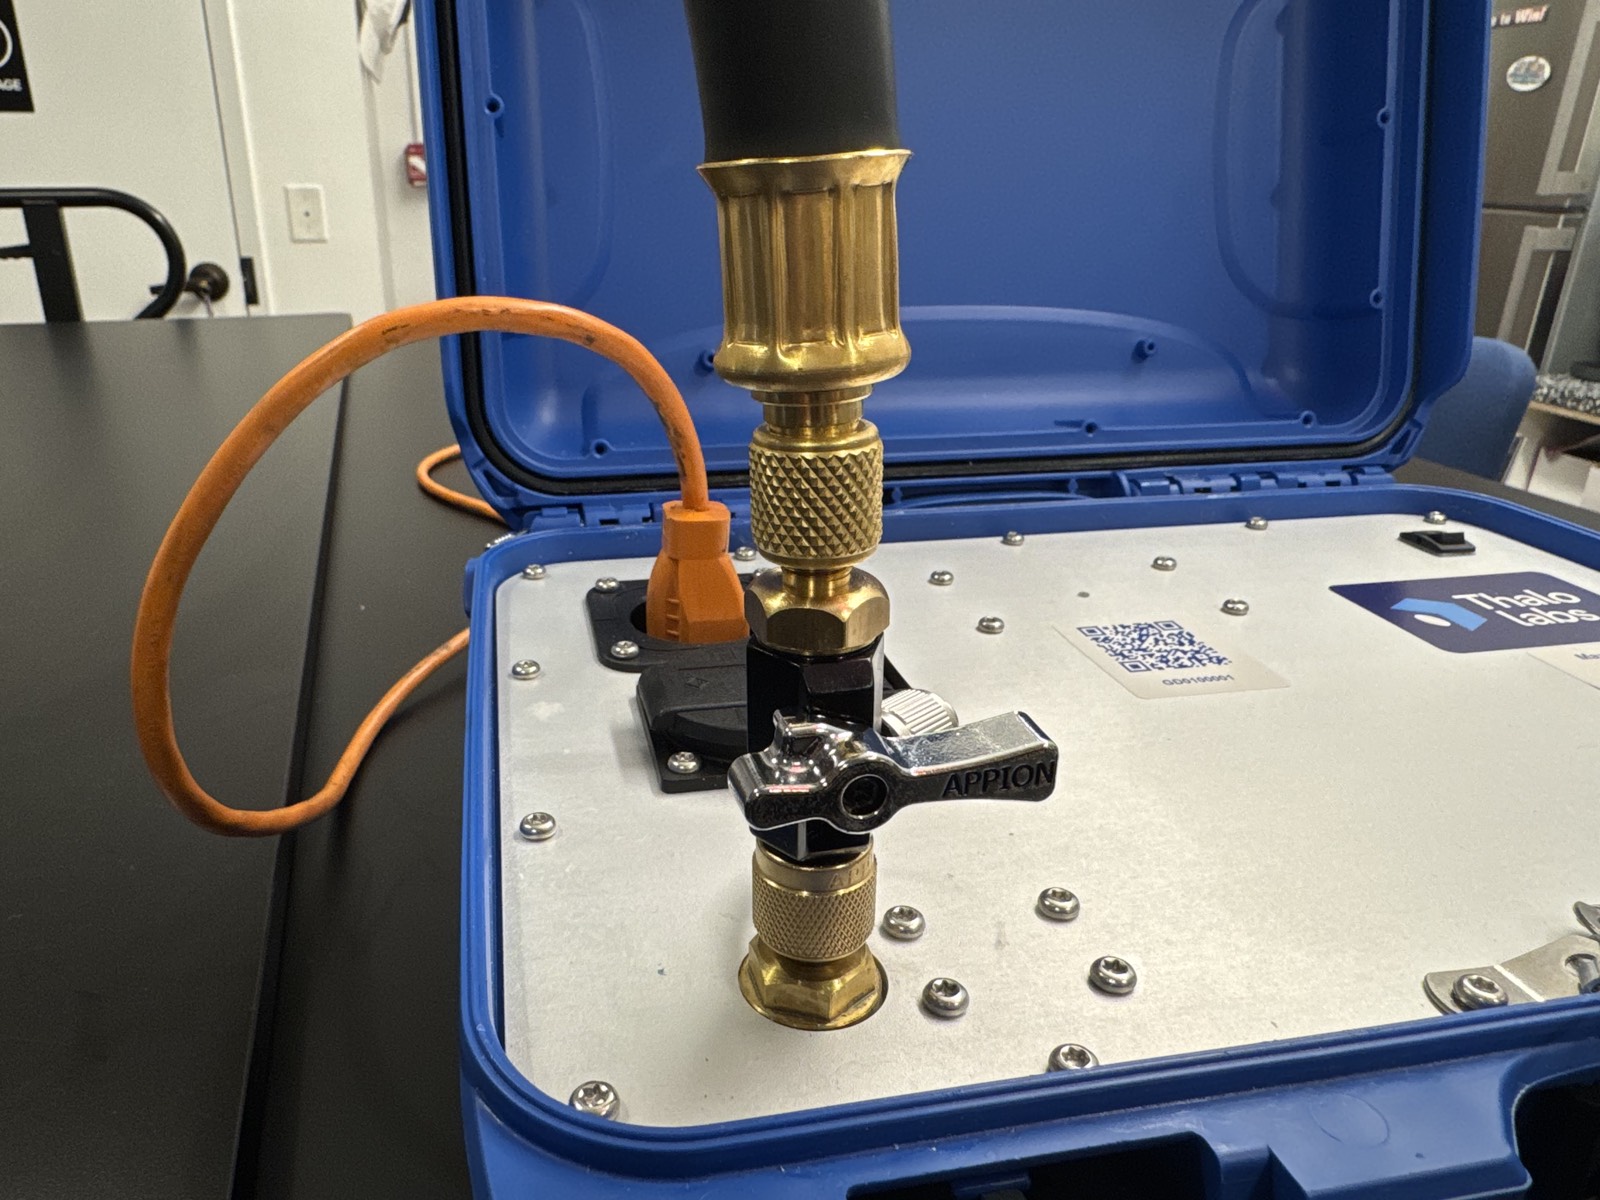
Attach the source CRT and 3/8" tubing to the left source port.
Use 3/8", not a 1/4" charging hose. At deep vacuum the hose chokes flow, not the pump. A 1/4" line passes about a third of what 3/8" does and can make 500 microns unreachable. The wider line also gets you to test pressure faster on the nitrogen side.
-
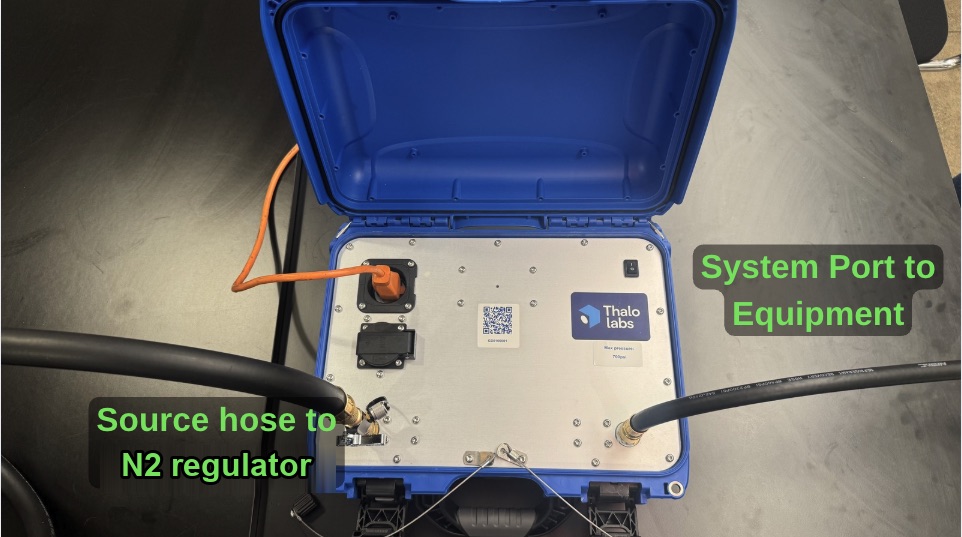
Run the source hose from your nitrogen regulator to the source CRT on Gordon's left source port.
Run the system hose from Gordon's right system port to the equipment. (Put a second CRT, the service-line CRT, on the equipment's service port. It holds the vacuum while you swap to refrigerant.)
The system hose stays put all job. Only the source hose moves between phases.
Open the source CRT to begin the nitrogen test, and keep the regulator under Gordon's 700 PSI max.
-
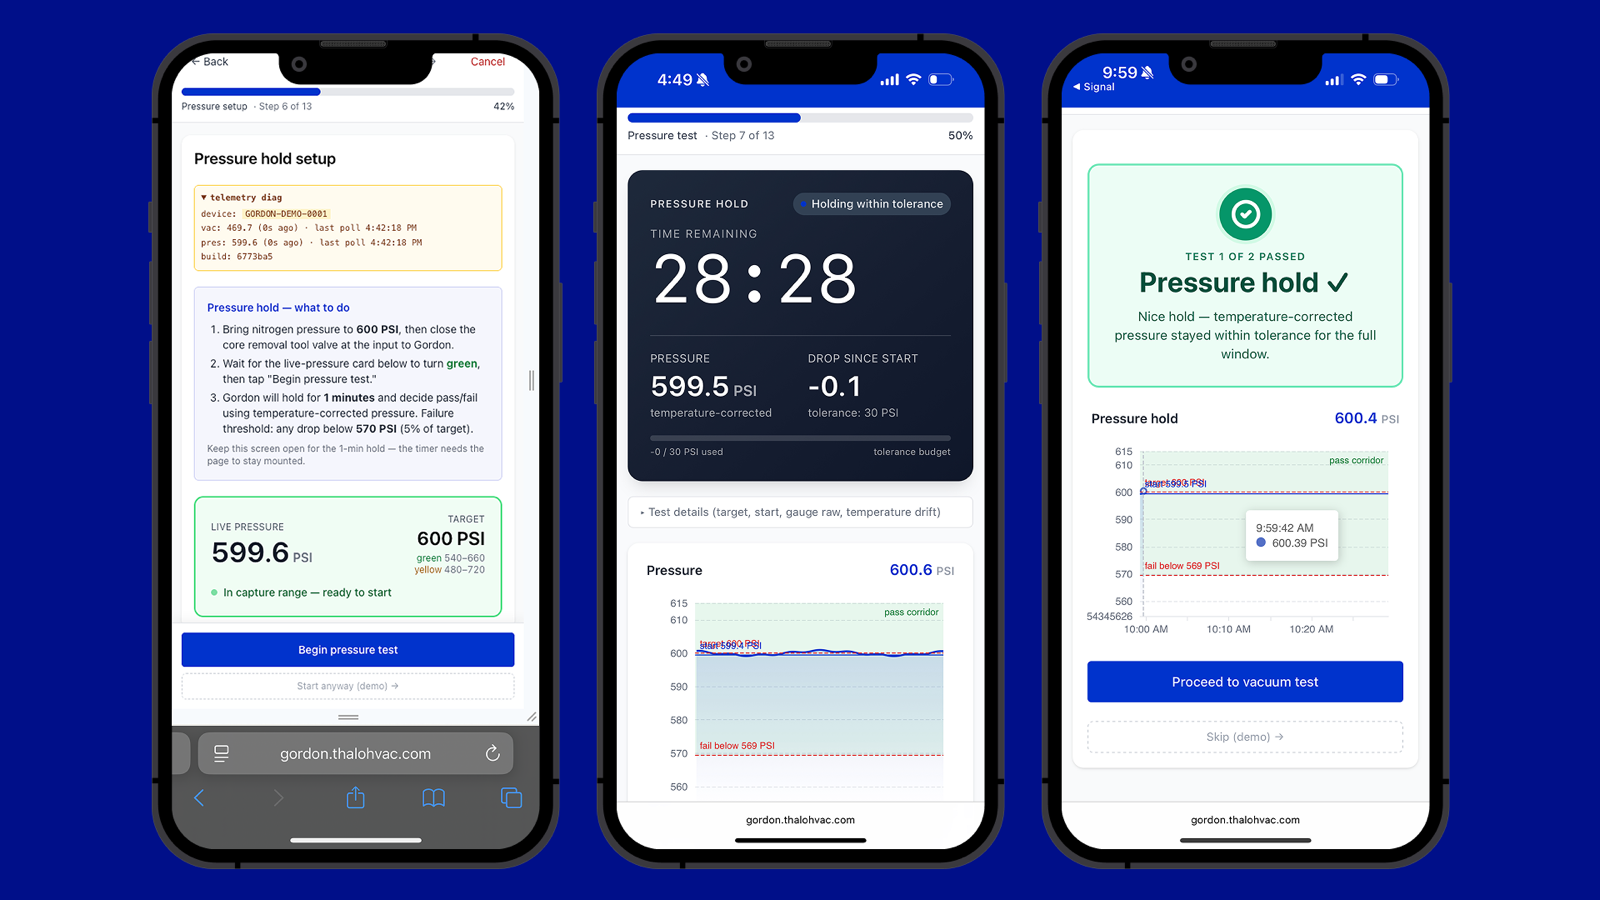
Open the regulator slowly until the live-pressure card turns green. Close the source CRT valve, then close the regulator. Tap
Begin Pressure Testand leave the regulator alone.Gordon holds for the set time and calls pass or fail on temperature-corrected pressure.
A pass shows a green confirmation screen. If it fails, restart the test.
-
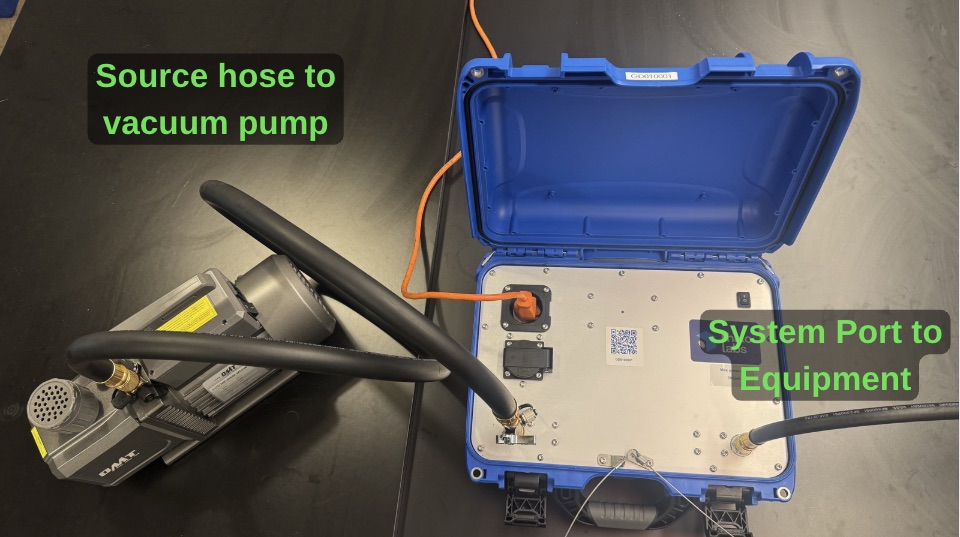
Move the source hose to your vacuum pump. Clear trapped air in the source CRT by turning its valve on and off three times.
-
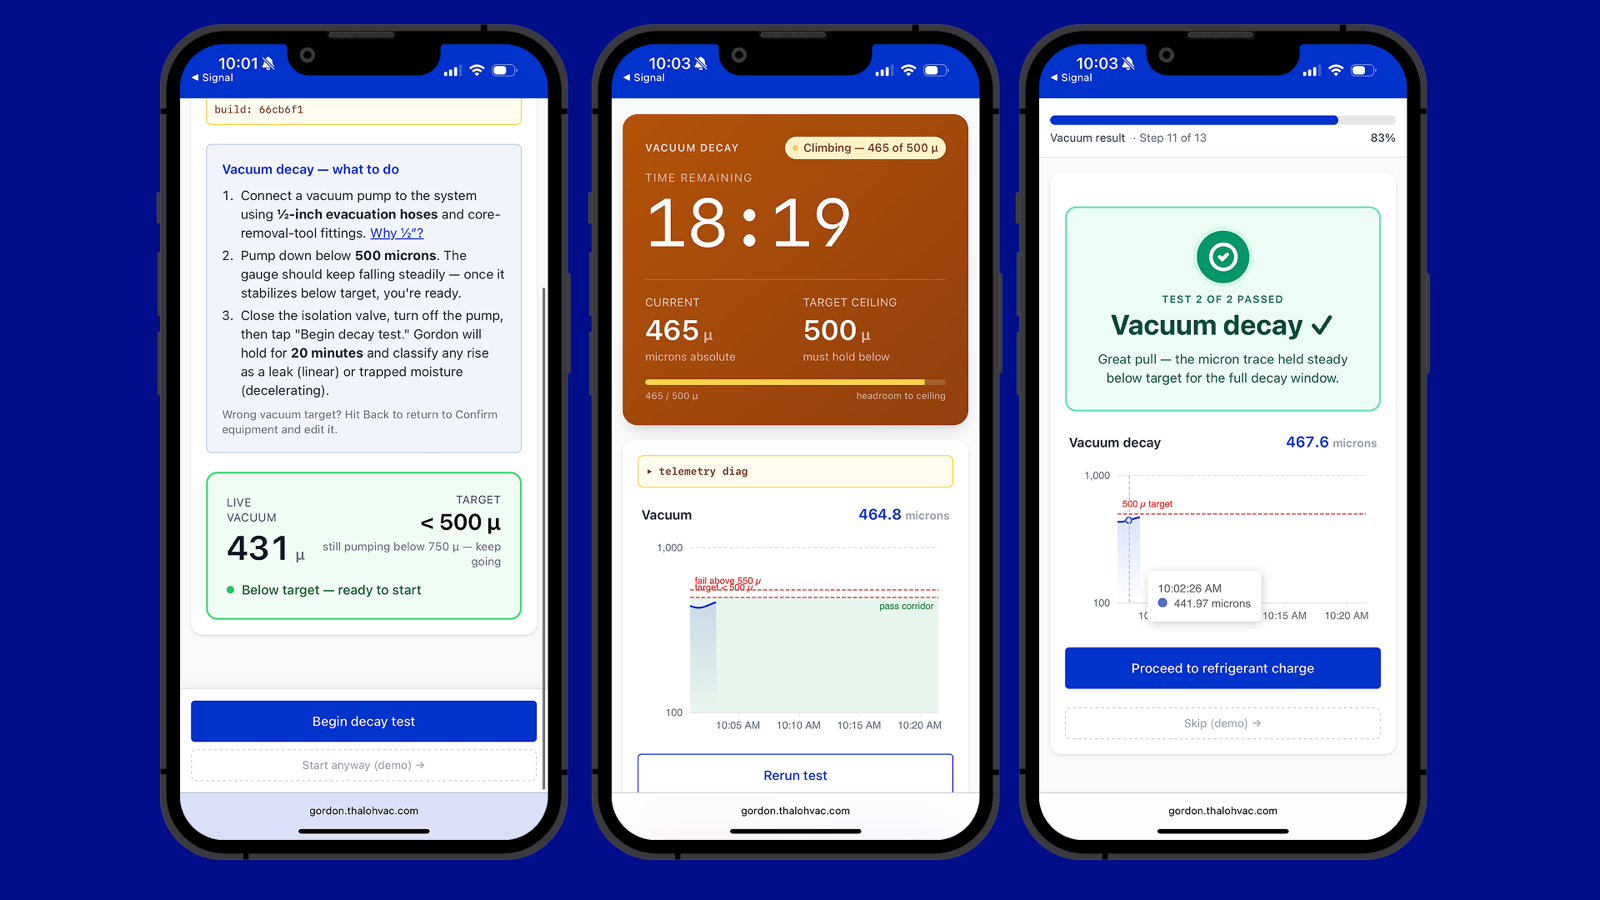
Pump down to the target vacuum in microns until the reading stabilizes. Close the source CRT, stop the pump, and tap
Begin decay test.A pass shows a green confirmation screen. If it fails, restart the test.
Close the service-line CRT and disconnect Gordon. The closed service-line CRT holds the system under vacuum. Tap
Proceed to refrigerant charge. -
Add the refrigerant your normal way. It does not run through Gordon.
Stand the cylinder on a tared scale and connect your charging hose to the service port. Get the target from the manufacturer's manual, meter it in by weight while watching the scale, and close the cylinder valve at the target. Note the weight you added.
-
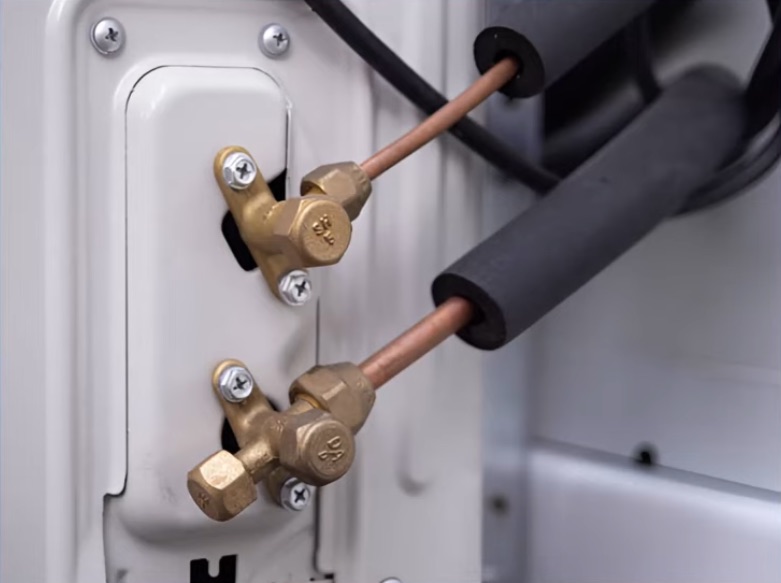
Close the service-line CRT and disconnect your charging hose. Back-seat both outdoor service valves, suction first, then liquid. The factory charge flows into the line set and the system goes live.
The app does not ask for this. Do it before you generate the certificate.
-
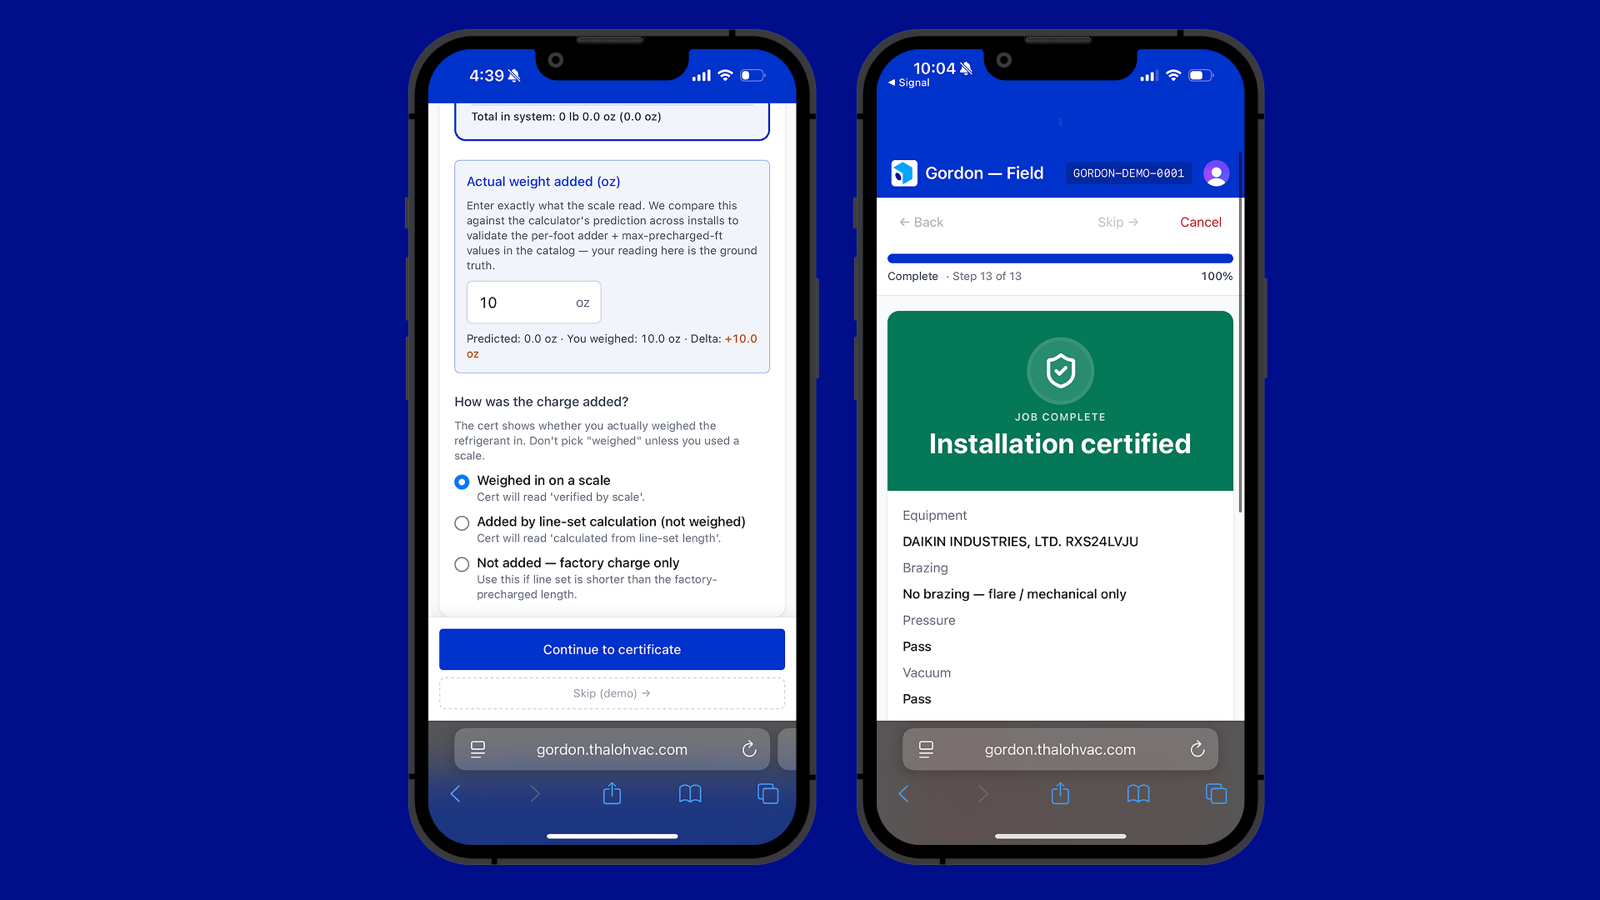
In the app, enter the line-set length and the actual weight you added, then pick "Weighed in on a scale."
Continue to the certificate and download the PDF. The QR code resolves to the full sensor trace.
Power Gordon off.